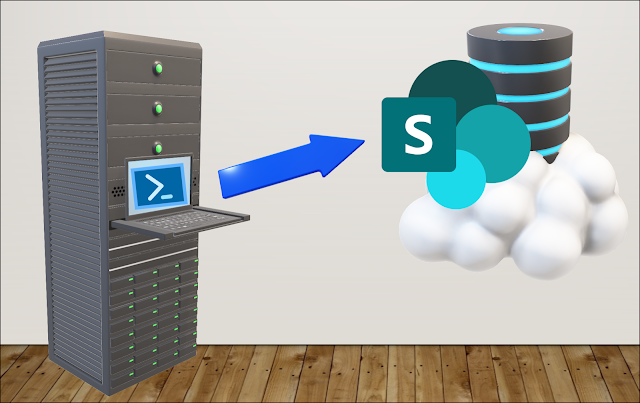
Companies that have gone through several generations of IT systems will have to make their cloud journey in small steps - system by system. Devices and document storage are quickly moved to Microsoft 365. Special Line of Business systems may take longer to cloudify. This can present challenges in making data from dinosaur systems available to users of the modern Microsoft 365 platform.
The challenge from a real world scenario
I was challenged by a customer with a production environment running in an old on premises environment while all users and endpoints had converted to Microsoft 365. They had challenges in reaching reports that were produced on premises and needed a solution to have this data automatically uploaded to Sharepoint for easy and modern access. Challenge accepted!
Solution
Read on to get a detailed insight into the solution that made the desired elasticity in the migration to the cloud.
Sharepoint Site
We started out by creating a separate Sharepoint site for the purpose.

We planed to create an Azure App registration with limited rights for the SharePoint site where authentication will be done with a private certificate between the server on premises and the online Azure/Sharepoint environment.
Private Certificate
The private certificate is created in Powershell on the server on premises which will upload the data. The PFX private key of the certificate will be installed on the server, while the CER public key of the certificate will be installed in Azure.
$cert = New-PnPAzureCertificate -OutPfx .\pnp.pfx -OutCert .\pnp.cer -CommonName "SP Upload" -ValidYears 5
The PFX private key certificate is installed on the server from an elevated powershell.
Import-PfxCertificate -Exportable -CertStoreLocation Cert:\LocalMachine\My -FilePath .\pnp.pfx
The certificate can now be verified in the Microsoft Management Console (MMC) within the Certificates Snap-in for Local Computer.

Azure App Registration
Inside Microsoft Azure Admin Portal - Azure Active Directory we find App Registrations where a new registration is added.


Once the App Registration has finished, take a note of the Application Client ID.

Assign Sharepoint permissions
Inside the Application Registration, we find the API Permissions which now should be assigned for Sharepoint.


With the "Sites.Selected" permission set, I am now able to give rights for this App Registration to specific Sharepoint sites. This is done with Microsoft Graph API, and for this tutorial I will be using Graph Explorer. First I run a GET in order to receive the ID for the Sharepoint site:
 |
| https://graph.microsoft.com/v1.0/sites/tenantname.sharepoint.com:/sites/SPSiteName?$select=id |
The number in the middle from the response will be the ID we need. Test this by running a query for permissions on this ID in Graph Explorer: https://graph.microsoft.com/v1.0/sites/XXXXXXXX-XXXX-XXXX-XXXX-XXXXXXXXXXXX/permissions
You might get an error at this point which you can get past by giving consent to the site.

Now it's time to give write access to the actual site for the current app registration. This is done by the following code as a Post operation:
Now it's time to give write access to the actual site for the current app registration. This is done by the following code as a Post operation:
{
"roles": [
"write"
],
"grantedToIdentities": [
{
"application": {
"id": "XXXXXXXX-XXXX-XXXX-XXXX-XXXXXXXXXXXX",
"displayName": "SP SITE NAME"
}
}
]
}
Add the code to Microsoft Graph Explorer as Post and run the query.

At this point, the Azure App Registration has rights to write to the specified Sharepoint site.
Assign Certificate for authentication from the on premises server
I am now uploading my public key certificate created on the on premises server to prepare for the authentication. This is done from Manage - Certificate & Secrets - Certificates - Upload Certificate:


Script for upload of data
Access to the site by use of the certificate can now be tested in Powershell with the PnP.Powershell module from the actual server.# Install-Module PnP.Powershell0
Import-Module PnP.Powershell
Connect-PnPOnline -Tenant XXXXXXXXX.onmicrosoft.com -ClientId XXXXXXXX-XXXX-XXXX-XXXX-XXXXXXXX -Thumbprint XYXYXYXYXYXYXYXYXYXYXYXYXYX -Url https://TENANTNAME.sharepoint.com/sites/SITENAME
The command Get-PnPList will now list all content on the site. Take note of the last part of the URL for the Document library. This is used in the $SPFolder variable in the following script.

I have now created a short script which will upload all files from a defined folder on the on premises server to the Sharepoint site. Uploaded files are then moved to a separate folder on premises.
# Install-Module PnP.Powershell
Import-Module PnP.Powershell
Connect-PnPOnline -Tenant tenantname.onmicrosoft.com -ClientId XXXXXXXX-XXXX-XXXX-XXXX-XXXXXXXXXXXX -Thumbprint <your-certificate-thumbprint-goes here> -Url https://tenantname.sharepoint.com/sites/SharePointSiteName
$SPFolder = "Shared Documents"
$Files = Get-ChildItem "C:\Simon\ToImport"
foreach ($File in $Files) {
if ($File.PSIsContainer -ne $true) {
write-host $File.Fullname
$Upload = Add-PnPFile -Folder $SPFolder -Path $File.FullName
Move-Item -Path $File.FullName -Destination "C:\Simon\Imported"
}
}
A test-drive of this script verifies that the file is uploaded to the Sharepoint site and the document is moved to the defined subfolder on the on premises server.

The script can now be added as a scheduled task on the on premises server with powershell as the progam/script, and "-File C:\Simon\UploadFilesToSharePointLibrary.ps1 -ExecutionPolicy Bypass" as argument.
The script can now be added as a scheduled task on the on premises server with powershell as the progam/script, and "-File C:\Simon\UploadFilesToSharePointLibrary.ps1 -ExecutionPolicy Bypass" as argument.

Complementary information
Desmond Tutu once wisely said that "there is only one way to eat an elephant: a bite at a time." What he meant by this is that everything in life that seems daunting, overwhelming, and even impossible can be accomplished gradually by taking on just a little at a time.
You can't migrate a complex environment in a weekend. You need to do it step by step. I hope this can inspire someone to find smart ways to automate a way from ground to the cloud.
The following sources was used for inspiration while figuring out this routine:
- How to use Microsoft graph
SharePoint Sites.Selected application permission in a Azure AD application for
more granular control by Mohamed Ashiq Faleel

No comments:
Post a Comment